Configura il tuo blog con WordPress: la guida definitiva
Annuncio pubblicitario
WordPress è la piattaforma di blog più potente al mondo; quasi uno su tre siti su Internet è alimentato da WordPress. WordPress separa il contenuto di un sito dal codice back-end che guida il sito. Ciò significa che è possibile eseguire un sito Web completamente funzionale senza alcuna esperienza di programmazione Web.
Se non hai mai gestito un sito web prima, ti consigliamo vivamente di risparmiarti il mal di testa e di pagare un host WordPress gestito che gestisce il lato amministrativo per te. E per questo, non c'è niente di meglio di WP Engine.
Ma se vuoi provare a configurare WordPress da solo, questa guida ti guiderà attraverso tutto ciò che devi sapere da zero.
Vai avanti: introduzione a WordPress | Concetti chiave | Operazioni di base | Ottimizzazione per i motori di ricerca | Gestione delle immagini | Promozione blog | Fare soldi | Backup e ripristino | Ottimizzazione di WordPress
1. Introduzione a WordPress
Separando il contenuto delle tue pagine dal layout, WordPress può quindi generare dinamicamente nuovi file HTML ogni volta che qualcuno visita il tuo sito. WordPress si occupa anche di collegare automaticamente i tuoi post, creare la barra laterale con collegamenti ai tuoi ultimi contenuti e gestire gli archivi. Infatti, poiché WordPress funziona con modelli di temi HTML che è possibile scaricare, non è mai necessario scrivere una sola riga di codice HTML: tutto ciò di cui devi preoccuparti è scrivere il contenuto effettivo e caricare le tue foto. WordPress si occupa della codifica del sito Web, basta fornire il contenuto. È questa separazione di modello e contenuto che ha aperto il mondo della gestione di un sito Web, un blog, al mondo.
Perché WordPress?
Sebbene WordPress sia più comunemente usato per creare un sito in stile blog - che è tecnicamente solo una serie di post con una data e un'ora specifiche in cui sono stati pubblicati - può anche essere facilmente adattato per adattarsi a siti Web statici, come per la tua attività locale, portfolio di artisti o persino un sito di shopping online completo. Mentre approfondisci WordPress, scoprirai che esiste un plugin WordPress per creare letteralmente qualsiasi tipo di sito web a cui potresti pensare.
WordPress non è l'unico CMS in circolazione, quindi perché scegliere WordPress? Semplice:
- È ricco di funzionalità, quindi con l'installazione di base dovresti essere in grado di tutto ciò che vuoi. Se manca qualcosa per le tue esigenze particolari, è molto probabile che sia già stato creato un plug-in per gestirlo. Il risultato è che non è necessario codificare nulla.
- È maturo: creato nel 2003, ha avuto una vita molto lunga finora e continua a essere in fase di sviluppo attivo. Questo non è un nuovo software di rilascio beta difettoso, è incredibilmente stabile.
- È sicuro. Come con qualsiasi software o sistema operativo, nel corso degli anni si sono verificati alcuni gravi hack, ma gli sviluppatori ci hanno superato rapidamente. Le ultime versioni includono avvisi importanti quando è disponibile una nuova versione, e purché controlli regolarmente il tuo blog e lo aggiorni quando necessario, ci sono poche possibilità che il tuo blog venga violato.
Non sei ancora convinto?
- È incredibilmente facile da installare
- Ci sono letteralmente migliaia di plugin per aggiungere funzionalità
- Gestione immediata di immagini e supporti per portfolio istantanei e siti fotografici
- La semplice codifica per le funzionalità di base rende facile per i programmatori principianti personalizzare il proprio blog a livello di codice, tuttavia non tratterò alcuna codifica in questa guida.
La differenza tra WordPress.org e WordPress.com

Molte persone sono comprensibilmente confuse riguardo alla differenza tra WordPress.com e WordPress.org, quindi prendiamoci un momento per esaminare questo prima di iniziare.
WordPress.com ti offrirà un blog gratuito, ospitato sui server di WordPress. È più adatto per i principianti assoluti: non devi preoccuparti di configurare file o database e tutto è curato per te. Un WordPress. com blog è simile a qualsiasi altro servizio di blog online come Blogspot o Tumblr. È il modo più semplice in assoluto per iniziare con WordPress, ma è molto restrittivo nei plug-in e nei temi che puoi utilizzare, in sostanza puoi scegliere da un catalogo limitato di stili prescelti e plug-in approvati.
WordPress.org, d'altra parte, è il sito da cui è possibile scaricare il sistema WordPress ospitato e caricarlo sul proprio server. Avrai bisogno di un server in grado di eseguire PHP e un database basato su MySQL. Configurare un blog ospitato da solo è un po 'più difficile (pensa 5 minuti anziché 1), ma ottieni molta più libertà di fare come desideri, personalizza come preferisci ed è facile avere il tuo dominio dall'inizio . La maggior parte di questa guida farà riferimento alla versione wordpress.org auto-ospitata.
Per aggiungere ulteriore confusione, molti host web offriranno installazioni WordPress.org con un clic che installeranno i file e configureranno il database per te, quindi non è necessario configurare nulla! Se si sceglie di ospitare con un server condiviso, questa è l'opzione consigliata.
Hai bisogno di web hosting? Usa questo link per ottenere una tariffa speciale scontata sul servizio di hosting WordPress di InMotion Hosting!
Considerazioni sul dominio
Se scegli di utilizzare l'opzione blog gratuita per wordpress.com, il tuo indirizzo blog sarà qualcosa.wordpress.com (noto come "sottodominio") - puoi usare il tuo dominio, ma è un aggiornamento a pagamento - a quel punto puoi anche acquistare il tuo hosting.
Vale anche la pena di considerare il futuro - un sottodominio gratuito di wordpress.com potrebbe sembrare perfetto ora per iniziare, ma se il tuo blog diventa popolare - o ti piacerebbe farlo - avere il tuo dominio personale è di fondamentale importanza.
Lo vedremo più avanti in questa guida nella sezione "Ottimizzazione dei motori di ricerca" di base, ma se sei preoccupato e vuoi saperne di più sul perché dovresti avere il tuo dominio, vai avanti adesso.
Opzioni di hosting per WordPress con hosting autonomo
Il web hosting budget è un'area davvero competitiva e le opzioni variano enormemente, quindi starei molto attento nella scelta del tuo host.
Lascia che ti spieghi alcuni termini chiave che devi conoscere e considerare prima, prima di continuare a suggerire i fornitori che ho usato personalmente negli anni e che posso consigliare vivamente.
CPanel: questo è un software standard del settore che controlla il tuo hosting, come la configurazione di account di posta elettronica o database. Potrebbe volerci un po 'di tempo per imparare, ma è l'impostazione predefinita con la maggior parte degli host, quindi quando lo hai usato una volta saprai tutto. Di solito contiene anche un modulo chiamato Fantastico, che è un programma di installazione one-stop per WordPress e altre app Web: basta inserire il nome del sito, la password, ecc. E eseguirà i bit complicati del processo di installazione per te.
Larghezza di banda vs. velocità: la maggior parte degli host budget ti attirerà con promesse di archiviazione e larghezza di banda "illimitate", il che significa che i tuoi utenti possono scaricare o sfogliare il tuo blog quanto vogliono senza incorrere in costi aggiuntivi sulle bollette di hosting. In realtà, questo è completamente compensato dalla velocità con cui il tuo sito funzionerà, quindi anche se dovessi avere download costanti dal tuo sito, sarebbe così lento che nel corso del mese la larghezza di banda effettiva utilizzata è minima. Quindi non lasciarti ingannare da queste vuote promesse.
Esistono anche Termini e condizioni rigorosi per l'utilizzo della memoria di hosting: potresti essere tentato di pensare che con una memoria illimitata, puoi eseguire il backup dell'intero computer anche lì, giusto? Ma questo è generalmente vietato e l'archiviazione può essere utilizzata solo per "file specificamente correlati al sito Web". In breve, la larghezza di banda illimitata è fuorviante, quindi sostituisci le parole "larghezza di banda illimitata" con "velocità lenta" ogni volta che la vedi all'interno di uno spiel di marketing degli host.
Dominio gratuito: gli host budget addebiteranno un premio ogni mese ma ti offriranno un "dominio gratuito" quando apri il tuo account. Quel dominio gratuito potrebbe costarti solo $ 8 se dovessi acquistarlo da qualche altra parte, quindi assicurati di includerlo nel tuo calcolo dei costi. Fondamentalmente: un dominio gratuito non vale la pena urlare.
Domini aggiuntivi: verrai perdonato per aver pensato che con l'hosting illimitato potresti aggiungere tutti i domini che desideri, ma non è sempre così. Per un host che cito di seguito, domini aggiuntivi richiedono un $ 30 / dominio annuo in aggiunta alla quota di registrazione effettiva del dominio.
Database: alcuni host ti daranno accesso a database standard, mentre altri ti daranno invece un "database ospitato" separato, il che significa che si trova su un server remoto separato. I database ospitati sono più difficili da configurare manualmente con WordPress e mi ci sono volute ore per capire perché il mio nuovo WordPress non si installava la prima volta che ho provato. Ovviamente, puoi aggirare questo problema utilizzando il programma di installazione dell'applicazione speciale dell'host (Fantastico o simile), ma preferisco eseguire il rollup della mia copia pulita di WordPress.
Cicli CPU: con host condivisi budget, ci sono molti utenti su un singolo server. Ciò significa che mentre la larghezza di banda o lo spazio di archiviazione possono essere illimitati, i cicli della CPU non lo sono certamente. Diverse volte ho provato a eseguire alcuni nuovi plugin di WordPress su un host condiviso solo per ricevere prontamente una lettera di avvertimento che diceva che i cicli della CPU sono saltati e che il mio account verrà chiuso entro pochi giorni se non faccio qualcosa al riguardo .
Consigli per l'hosting di WordPress
A questo punto, se non hai ancora un servizio di hosting, dovresti cercarne uno. Non è possibile gestire un sito WordPress senza un server ed è molto più facile pagare per un servizio di hosting che ospitare il proprio server web.
Invece di formulare raccomandazioni in questo articolo, ti indirizzeremo alla nostra raccolta dedicata dei migliori provider di hosting WordPress I migliori provider di hosting WordPress I migliori provider di hosting WordPress Avvio del tuo sito WordPress? Ecco i migliori provider di hosting WordPress per ridurre al minimo il mal di testa e massimizzare le prestazioni. Leggi di più . Vai con uno di questi host WordPress per ottenere il miglior rapporto qualità-prezzo.
Come installare WordPress
Come ho già detto, puoi utilizzare il programma di installazione standard Fantastico fornito con il tuo hosting per configurare il tuo nuovo WordPress per te oppure scaricare e provare a installarlo da solo. Ti suggerisco di provare entrambi, ad essere sinceri, poiché il download e l'FTP dei file da soli è una buona pratica e hai la possibilità di consultare la directory e la struttura dei file dietro WordPress. Dovrai anche impostare un nuovo database da utilizzare per WordPress, quindi è un buon modo per imparare i dettagli di CPanel.
Invece di ripetere le fantastiche informazioni già disponibili, ti indicherò la direzione del codice WordPress che contiene le istruzioni complete per la configurazione di WordPress utilizzando lo standard industriale Cpanel.
Per i deboli di cuore o impazienti, premi il pulsante di installazione Fantastico e scegli un nome utente e una password. Il centro software del marchio GoDaddy è praticamente lo stesso.
Il pannello di amministrazione per l'installazione di WordPress è sempre accessibile su domain.com/wp-admin, ma se hai già effettuato l'accesso dovresti vedere una barra di amministrazione nella parte superiore dello schermo quando visualizzi una parte non amministrativa del tuo blog.
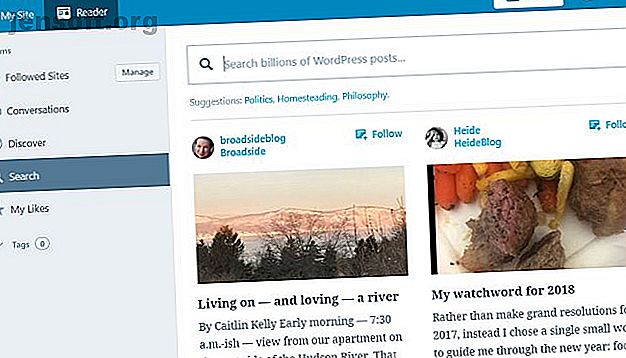
2. Concetti chiave
WordPress è cresciuto nel corso degli anni per comprendere una varietà di tipi di contenuti e ha sviluppato una propria terminologia, quindi sarebbe utile impararlo prima di saltarlo.
Ecco cosa devi sapere prima di continuare con la guida:
Posta: questo è il tipo di contenuto più fondamentale che costituirà la maggior parte del tuo blog. Un post è costituito da un titolo, il testo del contenuto stesso, una data di pubblicazione, una categoria, tag e allegati associati (come le immagini). I post sul blog sono generalmente concepiti per essere visualizzati in ordine cronologico con la prima che appare per prima. Vengono generati automaticamente archivi mensili e un feed RSS dei tuoi ultimi post.
Pagina: sono stati creati per ospitare contenuti statici per il tuo sito che non dovrebbero avere una data di pubblicazione, ad esempio Chi sono, o un modulo di contatto. Inoltre, non devono essere taggati o classificati e non sono inclusi quando gli utenti sfogliano gli archivi del tuo blog. Generalmente useresti le pagine per i contenuti a cui vuoi collegarti dalla prima pagina in ogni momento. Le pagine possono anche essere gerarchiche.
Categorie: termini generici per classificare i post. I post possono avere una o più categorie e quando gli utenti sfogliano un archivio di categorie, verrà mostrato un elenco di tutti i post in quella particolare categoria. Puoi anche assegnare sottocategorie per creare una gerarchia se il tuo blog ne ha bisogno. Le categorie non sono realmente opzionali, sebbene il sistema stesso non ti costringerà, se non riesci a classificare qualcosa, assegnerà una categoria predefinita di "non categorizzato".
Tag: i tag devono descrivere il post in modo più specifico rispetto alle categorie e possono essere utilizzati dai motori di ricerca per considerare la pertinenza della pagina. Ti consentono di creare widget di "tag cloud" e hanno anche pagine di archivio simili a categorie. Non sono essenziali, ma raccomandati. Non sei sicuro di come taggare i tuoi post? Un buon esempio potrebbe essere un blog di ricette, con categorie di pane, piatti principali, antipasti, dessert ecc. Ogni ricetta potrebbe quindi essere taggata con gli ingredienti, in modo che gli utenti possano, ad esempio, visualizzare tutte le ricette del pane o tutte le ricette fatte ( taggato) con farina.
Widget: piccoli blocchi di funzionalità che puoi aggiungere al tuo blog in vari luoghi, a seconda che il tuo tema li supporti, ma generalmente vanno nella barra laterale. Possono davvero fare qualsiasi cosa e spiegherò di più su di loro in seguito.
Permalink: questo significa l'URL da cui si accede alla tua pagina. Per impostazione predefinita, il collegamento permanente a un determinato post di blog può apparire come tuo yourdomain.com/?id=12345, che ovviamente non è così eccezionale. Più avanti, spiegherò come puoi cambiarlo in "graziosi permalink" del modulo yourdomain.com/deliciousbread-recipe.
Commenti: tariffa standard per i blog al giorno d'oggi, ma puoi disattivarli. Le pagine non possono essere commentate per impostazione predefinita, solo post di blog.
Tema: come viene visualizzato il tuo blog e WordPress ha i temi più gratuiti di qualsiasi sistema: letteralmente centinaia di migliaia tra cui scegliere. Scegliere uno può essere facile o un incubo, quindi è per questo che un'intera sezione di questo libro è dedicata ad esso. Vedi gli elementi chiave della maggior parte dei temi a destra.
Menu: una nuova aggiunta a WordPress versione 3 e ti consentono di creare menu personalizzati su tutto il tema (supponendo che li supporti). Esamineremo questa funzionalità in modo più dettagliato in seguito, ma tieni presente che molti temi non sono stati ancora aggiornati per includere questa funzionalità.
Immagini in primo piano: consente di specificare semplicemente e facilmente un'immagine associata per un post. Una volta impostati, i temi che supportano le immagini in primo piano visualizzeranno automaticamente l'immagine accanto all'estratto del post o in vari punti del tema. L'aggiunta del segnale visivo accanto al titolo di un post aumenta notevolmente la probabilità che i lettori facciano clic per leggere l'articolo. Non preoccuparti se il tuo tema non supporta immediatamente le immagini in primo piano: ti mostrerò più avanti nel libro come puoi aggiungere questa funzionalità in te stesso quando ci dilettiamo in un piccolo editing del tema.
Primi passi essenziali in WordPress
Anche se la famosa installazione di 5 minuti ti offre un sistema WordPress completamente funzionante sin dall'inizio, ci sono alcuni passaggi che ti consiglio di prendere prima di fare qualsiasi altra cosa.
Abilita Akismet Spam Control: rimarrai sorpreso dalla rapidità con cui gli spammer possono trovare il tuo blog e iniziare a inviare commenti. Ho lasciato un blog in uno stato di installazione di base una volta e in una settimana ha acquisito 100 notifiche di commento per il post di esempio "Hello World!". Vai prima a registrarti per una chiave API Akismet, quindi attiva il plug-in Akismet e configura la tua chiave API. Questo catturerà automaticamente la maggior parte dei commenti spam che possono rapidamente sopraffarti.
Modifica lo slogan del sito. Dopo l'installazione iniziale, la tua homepage mostrerà uno slogan di "Solo un altro sito WordPress". Vai alla schermata delle impostazioni generali per modificarlo e non dimenticare di salvare.
Abilita permalink graziosi. Dalla pagina Impostazioni> Permalink puoi scegliere un nuovo stile URL in modo che i tuoi URL abbiano un significato per loro. Puoi personalizzarlo come preferisci.
La scelta di un tema WordPress
Come con qualsiasi sistema che diventa il più popolare, le persone tenteranno di sfruttare utenti inconsapevoli. Per WordPress, questo è stato sotto forma di collegamenti nascosti nei codici tema, spesso a siti di contenuto dubbioso e codificati in modo tale che il tema si spezzasse se si tenta di rimuoverli.
Diffidare di scaricare temi gratuiti da siti Web casuali. Questa è un'area grigia dal punto di vista morale: alcuni disegnatori di temi si guadagnano da vivere vendendo questi link a spese pubblicitarie e sono quindi in grado di darti il tema gratuitamente. Se il tema proviene da un designer rispettabile, in genere è necessario scaricarli dal sito del designer anziché da un sito di raccolta temi, quindi suggerirei di lasciare lì il link o di pagare al designer per rimuoverlo (di solito lo offrono come servizio premium). Altrimenti, direi attenersi all'archivio dei temi ospitato da WordPress su wordpress.org, poiché i temi sono stati controllati e c'è una forte comunità dietro di loro. Fai solo attenzione a cercare su Google "temi WordPress gratuiti".
Più di recente, alcuni temi hanno persino incorporato malware al loro interno che trasformerà il tuo sito Web in una macchina spamming, e ho visto gli effetti di questa prima mano, nel peggiore dei casi con conseguente sovrapprezzo della larghezza di banda di $ 1.000 perché il server compromesso stava inviando e-mail di spam a una velocità allarmante. Quindi ripeto ora, mai e poi mai scaricare da un sito non attendibile, specialmente qualcosa che hai trovato dopo aver cercato su Google "temi wordpress gratuiti".
Dove scaricare in sicurezza temi WordPress
Archivio ufficiale dei temi di WordPress: nel caso in cui non lo sapessi, puoi accedervi utilizzando la stessa schermata di amministrazione di WordPress anziché visitare il sito reale. Seleziona Aspetto> Temi> Installa temi e cerca le parole chiave o filtra in base ai tag del tema.

WPShower: una selezione di temi premium e gratuiti, alcuni dei quali sono presenti nella selezione Photoblog / Portfolio di seguito.
Smashing Magazine: Sebbene sia principalmente un blog di design che tratta una varietà di argomenti, a loro piace arrotondare il meglio dei nuovi temi gratuiti e sponsorizzare regolarmente una nuova versione del tema, quindi vale sicuramente la pena iscriversi al loro feed.
Sito5: i temi Premium (o a pagamento) sono ovviamente un'altra opzione, quindi se sei disposto a spendere fino a $ 50 su un tema unico o vai in un "club" a tema, questi sono alcuni dei posti migliori per iniziare a cercare:
- WooThemes: il più costoso del lotto a $ 15 al mese per un accesso illimitato al tema, ma di grande qualità.
- ThemeForest: la più grande collezione di temi premium, tutti a prezzo individuale.
- ElegantThemes: una selezione molto completa e avrai accesso illimitato a tutti loro per $ 39.
Se stai cercando temi specifici per i blog fotografici, vai al capitolo Gallerie e gestione delle foto.
Alla fine del libro introdurrò altri fantastici siti di risorse WordPress, ma per ora puoi iniziare a lavorare sul tuo nuovo blog usando il tema predefinito, trattato nel prossimo capitolo, oppure andare avanti e scegliere un tema diverso da le fonti che abbiamo elencato sopra.
3. Operazioni di base: scrivere il tuo primo post
Questa sarà la sezione più breve di questo articolo, perché WordPress è così facile da usare che davvero non hai bisogno di istruzioni per iniziare a scrivere.
In effetti, la maggior parte delle funzionalità disponibili all'interno di WordPress è ora a portata di clic con l'utile barra degli strumenti di amministrazione. Una volta effettuato l'accesso al sito, dovresti vederlo su qualsiasi pagina visualizzata sul tuo sito. Non preoccuparti: solo tu puoi vederlo, non i tuoi visitatori abituali.

Per scrivere un nuovo post sul blog, passa con il mouse su Aggiungi nuovo> Pubblica sulla barra laterale di sinistra. È così semplice. Nell'area di amministrazione, c'è anche un pulsante per scrivere un nuovo post in alto a destra e un collegamento nella sezione Post sulla barra laterale in ogni momento. Le cose dovrebbero essere autoesplicative da lì.
Suggerimento: se ti accorgi di un'improvvisa esplosione di ispirazione, ma non vuoi pubblicare tutto in una volta, puoi impostare la data di pubblicazione in futuro. Il pulsante Pubblica diventerà Pianificazione e all'ora impostata il post verrà pubblicato automaticamente. Molto utile se stai trascorrendo una lunga vacanza.

Esistono due modalità di modifica durante la scrittura di un post: la scheda Visual fornisce un'anteprima del post: una visualizzazione WYSIWYG, se lo desideri, che mostra le immagini e la formattazione del testo che hai applicato. L'articolo finale dipenderà ovviamente dal modello del tema, motivo per cui c'è anche un pulsante di anteprima per vedere il tuo pezzo finito nel contesto e apportare modifiche.
Come caricare un'immagine su WordPress
Nella schermata di modifica post, fai clic sul pulsante Aggiungi file multimediali per aprire la finestra di caricamento delle immagini.

Dopo aver scelto un file sul tuo computer locale e aver premuto il caricamento, ti verrà presentata la seguente schermata un po 'confusa, quindi diamo un'occhiata a questo in un piccolo dettaglio.

Prima di tutto, il collegamento Modifica immagine è abbastanza utile, che consente di ritagliare, ruotare e ridimensionare l'immagine. È facile trascurare però, e per la maggior parte probabilmente non ne avrai bisogno. Seguendo nella parte inferiore dello schermo ci sono alcuni campi di testo che puoi inserire. Se aggiungi una didascalia, verrà visualizzata sulla tua pagina sotto l'immagine. Il titolo, il testo alternativo e la descrizione sono comunque nascosti. Saranno utilizzati per i browser che non possono visualizzare immagini o utenti con problemi di vista o da Google quando le persone eseguono una ricerca di immagini. Impostarli non è richiesto altro che un titolo, ma se hai una fotografia di cui sei particolarmente orgoglioso o forse una foto che hai creato (come un'infografica), vale la pena impostarle.
Successivamente, l'URL del collegamento. Questo determina se gli utenti possono fare clic sull'immagine per una versione più grande o meno. Se non vuoi che accada nulla, scegli nessuno. Se desideri che siano in grado di aprire la versione completa dell'immagine, scegli l'URL del file. L'URL del post collegherà l'immagine alla propria pagina (la pagina "allegato"), che assomiglia a un normale post ma contiene solo quella foto. Dato che in genere inserirai immagini di dimensioni adeguate al tema, il collegamento a una pagina di allegato separata è in qualche modo ridondante: è meglio collegarsi all'URL del file completo se si desidera che gli utenti siano in grado di visualizzare l'immagine completa in tutti.

L'allineamento determina se il testo scorre intorno all'immagine (a sinistra o a destra) o se si trova da solo, con nessuno predefinito o al centro della pagina. Ancora una volta, se hai impostato le dimensioni delle immagini per adattarle perfettamente alla tua pagina, non dovresti davvero averne bisogno. Se un'immagine è solo la metà della larghezza della colonna del contenuto completo, spesso appare meglio allineata a sinistra o a destra con il flusso del testo e aiuta a evitare spazi bianchi morti.
La dimensione è un'opzione importante. Queste dimensioni possono essere impostate in base al tema o impostate dalla pagina Impostazioni> Media. Anche se è una questione di preferenze personali, preferisco impostare la dimensione media come adattamento perfetto per la mia colonna di contenuti, con grandi dimensioni lasciate all'alta risoluzione predefinita: questo mi dà la possibilità di creare una vista simile a una galleria di foto se dovessi vorrei a un certo punto.
Infine, Immagine in primo piano è l'immagine che hai scelto di rappresentare quel post. A seconda del tema, può essere o meno utilizzato come anteprima in tutto. Anche se il tuo tema attuale non lo utilizza, è buona norma impostare l'immagine in primo piano nel caso in cui si aggiorni in un secondo momento a uno che lo fa, o decidere di hackerare la funzionalità del tema esistente da soli. Per un brillante esempio di immagini in primo piano in uso, controlla la homepage di MakeUseOf: quelle miniature che vedi funzionano tutte come immagini in primo piano.
Dopo aver impostato tutte le opzioni appropriate, puoi andare avanti e inserire l'immagine per posizionarla dove è stato l'ultimo cursore nel testo. So che il processo di caricamento delle immagini può sembrare un po 'ingombrante, ma le tue impostazioni sono ricordate, quindi la maggior parte delle volte devi solo premere upload> inserisci. Se questo ti dà ancora problemi, considera l'utilizzo di un pacchetto software esterno da cui inviare (vedi il capitolo su Suggerimenti casuali su come farlo).
Questo è tutto ciò di cui scriverò per quanto riguarda le operazioni di base, perché oltre a ciò tutto è così intuitivo: semplicemente non hai bisogno di una guida. Per aggiungere un plug-in, troverai l'opzione Aggiungi> Plugin sulla barra degli strumenti di amministrazione o l'opzione Plugin> Aggiungi nuovo menu sulla barra laterale.

I temi possono essere gestiti e installati dal menu Aspetto> Temi e widget configurati da Aspetto> Widget. Vedi cosa intendo di quanto sia intuitivo?
Man mano che installi più plugin, troverai più voci di menu che appaiono sulla barra laterale di sinistra. Sfortunatamente, spetta al singolo creatore del plug-in scegliere esattamente dove o in quale sezione sono collocati, quindi se non riesci a trovare la schermata delle opzioni per il plug-in appena installato, prova ad espandere tutte le sezioni e a controllare ogni link: ci sarò da qualche parte. Ti incoraggio anche a esplorare tutte le voci del menu delle opzioni, solo per sapere che hai un'idea di alcune delle funzionalità di WordPress.
Come incorporare i video di YouTube in WordPress
WordPress ha un po 'di magia per te in questo settore. Piuttosto che faticosamente andare su YouTube, espandere la scheda di condivisione e infine copiare e incollare i codici di incorporamento dell'oggetto, è sufficiente incollare l'URL del video direttamente nella schermata Modifica post. Quando viene visualizzato in anteprima o pubblicato, WordPress incorporerà automaticamente il video. Nessun codice disordinato, nessun embed complicato, basta incollare l'URL e lasciare che WordPress faccia il duro lavoro.
Comprensione dei widget in WordPress
Poiché la comunità di utenti e il numero di sviluppatori che lavorano per migliorare WordPress sono così numerosi, ci sono letteralmente milioni di plugin e widget che puoi aggiungere al tuo sito. Ma cosa sono i widget?
I widget sono piccoli blocchi di funzionalità e possono variare da qualsiasi cosa semplice come mostrare un elenco dei tuoi ultimi 5 post di blog o i tuoi ultimi tweet, a un widget di Facebook Connect che mostra gli avatar dei tuoi fan di Facebook.
Per gestire i tuoi widget, vai alla voce di menu Aspetto> Widget sulla barra laterale della dashboard di amministrazione o sulla barra di amministrazione visualizzata in tutto il sito. Sul lato destro dello schermo ci sono le varie aree dei widget disponibili sul tema corrente. Tuttavia, se non viene mostrato nulla qui, il tema scelto non supporta i widget. Trova quello che fa. Alcuni temi supportano più widget, ad esempio nella barra laterale e nel piè di pagina.

Trascina e rilascia i widget dalla casella "Widget disponibili" nella barra laterale o in un'altra casella dei widget sulla destra. Puoi anche riorganizzare l'ordine di tutti i widget già presenti. Una volta posizionato, la maggior parte dei widget può essere personalizzata in qualche modo. Mostra le opzioni facendo clic sulla freccia verso il basso per aprire la schermata delle opzioni dei widget e non dimenticare di fare clic su Salva se si varia qualcosa. Alcuni widget funzioneranno così come sono o non necessitano di personalizzazione.
WordPress viene fornito con una serie di widget integrati che svolgono una varietà di funzioni, quindi leggi le descrizioni e provale sul tuo sito, la maggior parte sono autoesplicative. Personalmente, ti suggerisco di usare almeno:
- Ricerca
- Post recenti, che mostrano gli ultimi 5 post.
- Elenco delle categorie
- Link, per mostrare i tuoi blog preferiti
Per mostrare gli ultimi post di un blog diverso (che non è necessariamente tuo), utilizza il widget RSS. Ciò estrarrà dinamicamente gli ultimi post dal feed RSS del sito, sebbene sia necessario inserire l'indirizzo del feed corretto. Per un altro blog WordPress, l'aggiunta / feed alla fine dell'URL della home page dovrebbe funzionare correttamente.
Potresti aver notato che il tuo sito ha già dei widget che funzionano sulla barra laterale per impostazione predefinita, ma la schermata dei widget non mostra nessuno come attivo. Questo perché la maggior parte dei temi ha un set predefinito che viene mostrato quando l'utente non ha personalizzato nulla. Se inizi a personalizzare l'area del widget trascinando e rilasciando anche solo un widget, le impostazioni predefinite scompariranno tutte per mostrare la tua area personalizzata. Se lo rimuovi di nuovo, verrà avviato il valore predefinito.
Noterai che c'è anche un'altra casella chiamata "Widget inattivi". Trascinando qui uno dei tuoi widget esistenti, puoi "salvarlo", mantenendo le impostazioni. Puoi trascinare qui più copie dello stesso widget e ognuna verrà salvata per un uso successivo.
Come si ottengono più widget?
I widget sono solo un altro tipo di plug-in e molti tipi di plug-in per l'aggiunta di funzionalità hanno widget inclusi. Se si desidera sfogliare i plug-in che sono stati specificamente contrassegnati come widget o con widget, è possibile sfogliarli dalla schermata Plugin> Aggiungi nuovo, in cui "widget" è uno dei tag principali. Un modo molto migliore per farlo è solo cercare il tipo di widget che desideri. Digita "twitter" (ad esempio) e ne troverai migliaia!
4. Ottimizzazione di WordPress e dei motori di ricerca (SEO)
Coprirò brevemente SEO perché i buoni contenuti da soli non sono sufficienti per far notare il tuo blog e la maggior parte dei blogger si arrende abbastanza presto se non vedono un buon numero di visitatori o feedback da loro. Assicurare che il tuo blog sia ottimizzato per i motori di ricerca è solo una parte della storia, controlla il prossimo capitolo per varie strategie per promuovere il tuo blog.
Che cos'è il SEO?
Fondamentalmente, SEO significa assicurarsi che il contenuto possa essere trovato, quindi il tuo post sul blog autorevole su "come nutrire i polli" si spera che venga visualizzato da qualche parte tra i primi 10 risultati quando un utente cerca Google per quella particolare frase. Certo, nessuno può garantire che ti classificherai mai bene, e alla fine è la * qualità * dei tuoi contenuti che ti terrà lì come fonte affidabile di informazioni, ma SEO è il launchpad da cui inizi e ti dai la migliore possibilità possibile.

Perché dovresti preoccuparti del SEO
Per molte persone, l'ottimizzazione dei motori di ricerca è una sorta di arte nera che semplicemente non si applica ai blog, alcuni addirittura la considerano come una sorta di "hacking illegale" per rendere il tuo sito Web più attraente per Googlebot. Mentre quella parte dell'argomento esiste sicuramente, la maggior parte delle tecniche SEO sono semplici buonsenso che dovrebbero essere applicate a tutti i siti Web su Internet. Ci sono anche alcune pratiche che devi fare attenzione, in quanto possono davvero danneggiare la tua posizione con Google.
Lascia che ti dica per esperienza che la SEO è qualcosa che devi davvero considerare fin dall'inizio: è molto difficile cambiare le cose una volta che hai creato un backlog di post sul blog indicizzati e hai già visitatori e link provenienti da altri blog — e rimarrai bloccato nella terra della mediocrità dei blog fino a quando non smetterai di pubblicare un giorno. Credimi, ci sono stato.

Disclaimer: No one can really know how the Google ranking algorithm works, and it's for that reason that attempting to game the system is foolhardy at best. What you can do is follow a set of best practices published by Google themselves, listen to advice from those with experience, and make your own decisions. In the end, much of SEO is simple commonsense, and as long as you write quality content for which the content is easily identifiable—by humans—then you should do just fine.
First Steps for SEO
Choose a set of keywords and if possible, focus your blog on a single topic. If you write lots of high quality articles on a single subject, and the subject is in your blog title and domain, then you will rank well for that keyword. It's as simple as that. My own site, ipadboardgames.org is currently ranking on the first page in Google for the keywords “iPad board game(s)” precisely because it is focused on one topic only, and has quality, trusted reviews that are linked to around the web.

But what if your site is not about a single topic—such as a general “about me” or personal blog? This is the most difficult to consider for SEO so you can expect to not rank particularly well for anything other than your own name. Try to write about a few unique, niche topics that you have expert knowledge on and you'll find you get a lot of traffic from those which will convert to regular visitors. For example, I once owned a blog that was a mix of mediocre tech tutorials, but one article was about how to install Windows using Bootcamp on a Macbook when the superdrive was broken—at the time it was one of only a few pages around detailing the process, and was even linked to from piratebay.org, which literally rocketed the blog to around 500 visitors a day.
A third type of blog you may be interesting in creating is about you, but also offering your professional services. In this case you still need to target some particular keywords “tree cutting Wisconsin”, but it's important you also regularly publish and share your specialized knowledge on the topic, thereby establishing yourself as an expert. Simply putting up a “business card” site just isn't enough anymore—you need to produce fresh content on a regular basis.
General SEO Advice for Any Site
The first thing you should do if launching a new site is to get a personalized, unique, relevant domain name like yourdomain.com .
Depending on the type of blog you're planning on making, the domain name is a good way to get a head-start with your Google rank. Basically, “exact match domains” are a key sign to Google that your site is relevant to a particular topic. All things being equal—an exact match of the domain will always win out against something generic. Subdomains don't count, by the way.
Set Correct Meta-Tags For Title and Description:
The page title is what appears in the user's browser at the top of the screen—as well as the title shown in Google search results. WordPress does quite well by default on titles, but you should avoid any that are too long or you may want to adjust the structure slightly. The meta-description is not human-readable on your blog itself, but it is used by Google in the search results page if you have one. If the description isn't set, Google will attempt to extract some part of your page that it deems relevant to the search query (in fact, it may do this anyway and just ignore your perfectly crafted description if it thinks it isn't relevant to the user at hand), so make sure you set one.

By default, WordPress doesn't set a description, so you'll need a plugin for this which I will describe later.
Use Images to Your Advantage:
One easily overlooked area of incoming search traffic is from Google Image Search. In one site I've managed, the traffic shot up 100-fold overnight because of a single image related to recent news—with that in mind, you can leverage images as an untapped source of traffic. Specifically, the image ALT and TITLE tags need to be set so they are relevant to your keywords. If you page is about “feeding chickens”, and you have a photo of a feed mix you made, with the filename “DSC1001.jpg”, and no ALT or TITLE tags set, you are throwing away a big traffic opportunity.
An easy way to make sure you leverage this is to fix the relevant fields when you upload images using the WordPress image uploader (see the screenshot), but what if you've forgotten to do it for all your existing posts? In the case, install the helpful SEO Friendly Images plugin. It will automatically add relevant tags to all your images, according to the title of the post they're attached to—it's not ideal, but certainly better than nothing.
Avoid duplicate or “low quality” content:
It should go without saying that copying someone else's content is bad, but many websites would previously do this automatically by simply “scraping” RSS feeds—there are even WordPress plugins that will do this for you. Make no mistake though, this practice is now easily recognizable by Google and results in a swift de-indexing of the offending site. It is therefore absolutely crucial that you don't copy and paste content from another source—make sure your blog posts are original! This doesn't mean you can't embed YouTube videos or quote another page, but make sure you do something else on top of that.
You should also make sure that each page of your site has a significant amount of good content—Google will penalize you for “low quality” content if you publish a post with just two or three sentences on it. So does this mean you can't post little thoughts or links you find? No, but it does mean they shouldn't be a blog post. Consider using the “asides” post type of the default twenty-eleven theme which shows the posts on the blog without giving them a whole separate page—or post them on Twitter. A good rule of thumb is that a blog post should be at least 300 words.
Easy SEO in WordPress With a Plugin
Yoast SEO is a fantastic free plugin that I always install on any new site.

There's too much functionality to cover it all here, but here's some highlights of what it does:
- Rewrites title tags so post titles come at the beginning, and allows you to write custom title tags for any archives or specific pages.
- Meta description editor, to easily add relevant meta descriptions site-wide and customize for individual pages and posts.
- Avoids duplicate content by setting the rel=canonical tag for you (if you don't understand what this means, it's a way of telling search engines what the original page was, since WordPress is capable of presenting the same post at multiple different URLs)
- 404 monitor to make sure your site remains error free.
- Slug-optimizer is perhaps the most curious sounding feature ever, the slug-optimizer removes useless short words from your pretty permalink URLs thereby making them shorter and more relevant.
- Social lets search engines know which social profiles are associated with the site.
- XML Sitemap handles XML sitemap generation for you.
- Advanced SEO takes care of advanced issues like breadcrumbs, custom permalinks, and RSS feed settings to identify your site as the original source of content.
Basically, it handles every aspect of SEO you will ever want, but you can disable any parts of it you don't need. Some are quite advanced and certainly not topics we can cover in this guide, but as you learn more about SEO, you can be sure you won't need to change plugins to get that extra functionality.
5. Galleries and Photo Management
If you only need to embed galleries of pictures into your posts occasionally, WordPress has built-in gallery functionality so you don't need extra plugins. Just upload the images on the appropriate post—you don't need to insert them, just upload (we call this “attaching” them to the post), then insert the shortcode wherever you want the attached images to appear.
Gallery and Photoblog Themes
- Revolt Theme: Check it out for yourself to get the full effect.
- Portfolio: straight up square grid portfolio, minimalist but professional.
- Imbalance: From the makers of the Portfolio theme, this is a brighter, more modern theme.
- Mansion: Removes any whitespace between photo previews and focuses on what matters.
- Square: Rather than trying to jam 20 photos on one screen, BigSquare simplifies things down to one photo after another complete with a quick information section on the side.
Photo Gallery Plugin
By default, WordPresss will attach images to a post. For most cases this is fine, but you may find yourself wanting something more powerful, with the ability to manage separate albums or galleries. In that case, I recommend a plugin called NextGen Gallery.
There's also quite a few plugins for the NextGen Gallery plugin itself, which might hint at how powerful it is.

With this installed, photo management is entirely separated from blog posts. You have Galleries which consist of one or more photos (one of which can be specified as the preview image for that gallery), and albums which consist of one or more galleries. You can still easily embed an entire gallery or album within a blog post if you need to (“hey, posted these to the gallery from Sam's wedding”), but you can also have a “photos” section, with all the galleries you have listed.
Photo uploads are also more powerful, with the option of either a zip, batch or individual uploads, and you can choose which gallery they go in (or automatically make a new one) when you upload. To embed you can either use the shortcodes provided [nggallery id=?] or use the new button on your visual editor bar. Read more about the plugin, or simply install using the Plugins > Add New and searching for it.
6. WordPress Blog Promotion
In this short section, I'll take a look at some proven strategies to promote your blogs, including practical methods you can put into practice, some warnings, and plugins you can make use of.
To simply write your blog isn't enough—you need to put yourself out there in the “blogosphere”—get in contact with other blog owners about possible link exchanges, and comment on other blogs that interest you or are related to yours.
A word of warning about commenting. Comment forms allow you to enter your name and website URL as a thank you link for giving feedback, but some users choose to take advantage of this by typing in their target keywords instead of a name—so that insightful comment might be written by “Best Dating Site”.

Opinions vary in the blog community over the legitimacy of this, but at MakeUseOf we take a strong stance against it—if you enter your name as a set of keywords, rest assured you will be deleted and banned from commenting. Also, make sure your comment is actually adding something to the conversation—it's easy to just write “hey, great blog post” and suddenly get your link in the comments, but again it's a morally grey area. Please, don't contribute to the mountains of web spam already out there.
Guest Blogging
Guest blogging is also a great opportunity, whereby you write a guest post on someone else's blog in exchange for a link in the article somewhere. MyBlogGuest (http://myblogguest.com/) is created by our own ex-writer Ann Smarty, and it's a great system to find suitable blogs or even guests to post content on your blog (and give you a well needed holiday).
Participate in a Blog Carnival
A blog carnival is when a topic is given, and writers from various blogs will write about that topic hoping to be included in the round-up. When the carnival submission process is over, the leader will write a round-up post highlighting all the best entries and linking to them. These can be very productive in terms of getting new traffic, as the lead blog usually has high numbers of readers to nudge in your direction.
As with commenting, try not to be too spammy and make sure the carnival you're participating in is actually related to your website—it's no good promoting your Asian dating site on a gardening carnival. The best way to find them is to search google for “blog carnival” followed by the topic of your choice.
Encourage Social Sharing
Some people are really getting sick of seeing a “Like” button plastered on everything these days, but there is absolutely no denying the power of social sharing for websites.

Adding some social share buttons to your blog posts couldn't be easier with these plugins:
- ShareThis: My recommended method as it produces very attractive share button strips with or without share counts, and includes a recognizable all-in-one share button, used by thousands of websites.
- ShareDaddy: Creates an individual button as well as an all-in-one share/email button.
- AddToAny: Creates a single share button that expands to show sharing links on various social networks.
If you're comfortable editing the theme files, you can also grab the codes directly from the relevant sites. See these links to generate the codes for the most popular social services:
- cinguettio
7. Making Money With Your Blog
A lot of people start blogging believing that it's an easy way to make money—just write something interesting, throw some ads on the page and you'll be rolling in free cash in no time. Like all get-rich-quick schemes, the reality is quite different. I don't want to put you off creating a blog to make money—if that's your intention then fair enough.
But you ought to know that's it's going to be a lot of hard work, the payback will be very little for a long time, and even after a few years you may just be making pocket change. Having said that, I'd like to introduce you to just a few of the ways in which you can monetize your blog.
Personally, I've been writing websites and blogging on various topics for close to 10 years now. It's only in the last year or so that I actually began to earn a living doing what I love.
Google Adsense
The classic way to monetize your blog is with Google Adsense advertising revenue. Head on over to adsense.google.com to apply, and use the easy tools to design your own blocks of advertising. There's a variety of shapes and sizes on offer, but stick to the Responsive size, which tends to produce the best results.
The easiest way to add these ads to your page is to open up the relevant template, then copy and paste the code in where you want it, but if you're uncomfortable editing theme code, use the plugin “All in One Adsense and YPN” to do this for you. Be warned, the plugin is set to donate a proportion of your ads displayed by default to the plugin creator, so if you don't want to do this then add 0 to the Donation setting.
Affiliate Links
The concept of an affiliate link is that you encourage your readers to purchase either in a particular store or a particular product, and in return you get a percentage of the sale. Amazon is perhaps the most famous and easiest to start with, primarily because no matter what you're promoting you're bound to find it for sale on Amazon.

You don't have to specifically recommend something though, even the Amazon widgets you can place on your sidebar are quite good performers—they've been programmed by Amazon to automatically tempt the reader with whatever they viewed lately on Amazon, or if there's no data they'll grab keywords from your page and automatically pull relevant products.
Sign up at Amazon Affiliates, and there are full instructions on either creating individual links or widgets, though explaining the process is out of the scope of this book. Unfortunately, you need to add affiliate links directly to your individual posts—there is no magical plugin I'm afraid.
If you're not comfortable doing this, then just copy the code for what Amazon calls the “Omakase” widget and paste it on your sidebar.
Amazon isn't the only affiliate program though. ClickBank offers downloadable ebooks and software packages on a huge variety of products, and pays better than Amazon due to the direct marketing approach on high markup download-only products.
8. WordPress Backup and Recovery
There are two main elements that need to be backed up in WordPress—the database, and the uploaded content. Let's take a look at the various methods available to you.
Via an SSH Command Line
If you have access to your server via SSH (a command line) then backing up and restoring your site is incredibly easy with a few simple commands. Unfortunately, shared hosts generally don't have SSH access—it's another of the privileges of having your own VPS. Here's a quick overview of the process in the event that you do have it though:
1. Login through SSH and change to your public_html or httpdocs directory (assuming you installed WordPress in the root).
2. Export the database by typing:
mysqldump –add-drop-table -u Username -p DatabaseName > BackupFilename.sql
Replace Username and DatabaseName with the appropriate details, and change the BackupFilename if you wish. Hit enter and type in your password. If you don't know the usernames or passwords, check your wp-config.php as they will be defined there towards the start.
3. Confirm you have your exported database file with the command.
ls
You should see your BackupFilename.sql somewhere.
4. Compress all your files and the database export using TAR command:
tar -vcf FullBackup.tar
-vcf is going to compress and give you a visual output of what is going on, I like it to show it's working. Make absolutely sure you have that final ., or the command will fail. This will give you a full backup file named FullBackup.tar which you can then download via FTP or remotely send to a secure backup location.
To restore from the FullBackup.tar, these are the steps you would take.
1. Assuming the FullBackup.tar in stored in the httpdocs or web root of the host, unpack it first:
tar -vxf FullBackup.tar
2. Restore your database using:
mysql -u Username -p DatabaseName < BackupFilename.sql
That's it, you site should now be accessible and working again. The backup process can also be automated to perform every day or every week without needing to login and type the commands again—just follow our automated WordPress backup tutorial Automate Your Wordpress Backup With Simple Shell Scripting & CRON Automate Your Wordpress Backup With Simple Shell Scripting & CRON Last time we talked about Wordpress backups, I showed you how incredibly easy it was to backup your entire database and files though SSH with only a few commands. This time, I'm going to show... Read More .
Via Plugins
WP-DB-Manager: Mentioned elsewhere as a useful tool to optimize your database, WP-DB-Manager also handles backups too. It'll give you a database backup file in the wp-content/ backup-db directory. This is a semi-manual method—so you'll still need to download your entire site using FTP (but this plugin will have handled the database side of things for you.
UpdraftPlus: This plug completely automates the regular backups of all of your blog files as well as your entire database. You can schedule the plugin to run at any interval. It supports storing your backups to Google Drive How To Backup & Restore Your WordPress Site Easily With UpdraftPlus How To Backup & Restore Your WordPress Site Easily With UpdraftPlus Read More .

VaultPress: This is a premium support service from the creators of WordPress themselves—so you can be assured it's rock solid and reliable. The service costs $15/month per site, but you're paying for the convenience, reliability and ease of use.
Backup Buddy: Another premium plugin I've heard fantastic things about. The cost is $75 one-off payment for use on up to 2 websites, and the features are really incredible.
Manual Backup and Recovery
Your written content is contained entirely within the database—but any media, plugins and themes you upload are stored in the wp-content directory. The other important file you need to backup is wp-config.php in the root—the rest of the files are standard WordPress system files that could be replaced by re-downloading WordPress.
Having said that, simply downloading your entire WordPress directory over FTP is the easiest way to backup files, but depending on the number and size of files you've uploaded, this could take a few hours.
On the database side, the only way to manually back it up is by using PHPMyAdmin through your web hosting control panel. The WordPress codex details this process in detail —but if you used the WP-DB-Manager plugin you will have a database file exported for you already, without needing to access PHPMyAdmin
In the event of a catastrophic failure, you need at least two things to restore your site:
- A full backup of all the files —At the very least, your wp-content directory and wp-config.php configuration file from the root.
- A full database backup of all tables —This will be either a .SQL, .GZ, or .BZ2 file.
Uploading your file backups is a simple process through FTP, just make sure you place everything in the same location again—so if your blog was originally installed into the /blog directory, make sure it goes there again (you can “migrate” your site to a different domain or directory, but that's another topic entirely).
Restoring your database must again be done through the PHPMyAdmin interface.
9. Optimizing and Scaling for High Traffic
This is a topic big enough to become an eBook all of its own, but I'm going to try and give a broad overview of the various methods available to you once your site becomes sluggish and needs to be scaled. A lot of people are under the impression that WordPress can only work for small scale blogs, but that simply isn't true.
Using a combination of various techniques, WordPress can scale to handle millions of requests a day. As I mentioned, MakeUseOf runs entirely on WordPress, accompanied by a number of key technologies. Once you reach about 1, 000 unique visitors a day, it's time to start thinking about scaling your website or some form of optimizing, so read on.
Server Upgrades
The obvious solution to initially scale your website is to migrate from shared hosting to your own private virtual server. This should be your first step if you're still on shared hosting, as there's simply no other miracle cure that's going to help—it only delays the inevitable.
My personal recommendation for a VPS hosting plan is the DV4 series from MediaTemple, and I personally have around 30 sites on a single $100/month plan there with amazing performance.

When the need arises, a VPS hosting plan will allow you to upgrade instantly by adding more RAM or additional CPU power.
Another benefit to having a VPS is that you're free to switch over to the much faster backend server software called NGINX. This is a high performance replacement for Apache, but still free. Setting it up is absolutely out of the scope this book though.
External Image Hosting on Content Delivery Networks
One key speed factor on your page is the time it takes to load images from your server. The page itself—the textual HTML content—is fairly fast, but the images will always be slow to load.
If you have a blog which makes heavy use of images on the front page for example, you may find the user experiences sever “sequential loading” where they're sitting there waiting for image after image to load, line by line in extreme cases. This is where the idea of external image hosting or CDNs comes in.
CDNs are high speed data centers situated around the world that mirror your image (and Javascript) content, serving them up to visitors as required from locations as near to the user as possible. The effect is instantaneous loading of images, and this technology is absolutely key to nearly every high-traffic site on the internet.

Although they are an additional cost, it's actually going to cost you a lot less than if you used the same amount of additional bandwidth on your hosting plan. The costs are very low—super fast MaxCDN.com offers a 1TB of transfer for $40 (expires after 12 months), while Amazon s3 storage is a little slower but significantly cheaper.
To make use of this kind of service you'll need the w3 Total Cache plugin described later in this chapter. An alternative to paid high speed data networks is simply to host your images with an external free service such as Flickr.com or Loadtr.com (check out the plugins list for how to do this).
CloudFlare to Reduce Unneeded Requests
Shockingly, up to a third of requests made to a website can be either malicious robots, automated scans or otherwise unfriendly. By cutting these out before reaching your site, you can ensure you only serve content to real users. This can be achieved for free with CloudFlare.com.
Once you switch your name servers to CloudFlare's, it essentially acts as a proxy and filter to keep out the bad guys and often results in significant speed increases on your page time. One minor point is that your site will see all visitors as coming from CloudFlare, so you'll need to install their WordPress plugin in order to correctly report the IP addresses etc.
Owned by MediaTemple hosting, CloudFlare is also a one-click install if you host your website on any of MediaTemple's plans, or you can follow our published tutorial.
W3 Total Cache Plugin
This is the big-daddy of caching plugins and has so much functionality you may find it a little overwhelming. I'll break down each feature it offers, but please remember that your mileage will vary—some users report very little improvement on using shared hosting for instance. I can tell you now that MakeUseOf wouldn't be able to run without this plugin:
- Page Cache: This is the core functionality, in that it creates a static copy of your site's posts and pages and can serve them rapidly to users.
- CDN: This enables you to host not only your media files (pictures etc) but also any theme files, graphics and javascript.
- Object and Database Cache: Particularly useful for slow database servers, this prevents the same query being made over and over.
- Minification: The art of making things tiny! This means removing any unnecessary spaces, line breaks and comments from HTML and Javascript. Generally, automatic mode works fine, but if your theme makes use of Cufon custom font Javascripts you'll need to tweak it manually.
- Browser cache and control headers: Although a lot of the internet is cacheable, many sites simply aren't set up by default to enable this. This feature makes sure your site's pages are sending the right headers to say to the user's browser “yes, you can cache this page for X days”.
Database Optimizations
Databases can often get messy. With constantly writing and updating entries, they accumulate temporary bits, referred to as overhead. This can grow the size of your database astronomically, and can often result in critically slow performance or a complete shutdown.
Keeping the database tables optimized is therefore very much recommended. WP-DB-Manager can handle this for you as well as giving a good graphical interface for database backups.
9.6 Maintenance
The latest WordPress includes a helpful UPDATES link in the Dashboard section of the Sidebar, and on that screen you'll find a complete summary as well as buttons to update all of your plugins as well as core WordPress files. Don't just hit update without some preparation first though:
1. Backup. As WordPress becomes more sophisticated and has ever more stringent beta testing, it's rare that an update procedure will actually break your blog—but it has been known to happen. Re-read the steps outlined in the backup chapter, and be sure you have those backups in place before proceeding.
2. Bear in mind that some plugins will break. As WordPress evolves, some functions made use of by plugins are deprecated, sometimes removed altogether. Again, it's rare but some plugins will break after upgrading to the latest WordPress. If this happens and your WordPress blows up somehow, go back to the chapter on Recovery again, and follow the steps there to fix your blog—but you may have to find an alternative plugin or keep the offending incompatible plugin deactivated until it's updated itself (so again, keep an eye on your updates screen!)
3. Don't panic. WordPress is for the most part quite a robust system, but things do go wrong. Unless you've catastrophically wiped your database through human error, no matter how bad things seem your blogs posts are usually never lost.
Get Blogging With WordPress!
As you can see, blogging with WordPress isn't as simple as running a quick installation package and then writing. There are a lot of things to think about. Everything from themes, plugins, backups, spam and more.
If all of this has your head spinning, we HIGHLY recommend forking over the extra cash to pay for managed WordPress hosting.
A managed WordPress host handles all of the administrative issues for you, allowing you to focus entirely on your site itself. The best managed WordPress host is WP Engine, which we use for our sister sites. It really doesn't get any easier than this!
Explore more about: Blogging, Longform Guide, Wordpress.

